
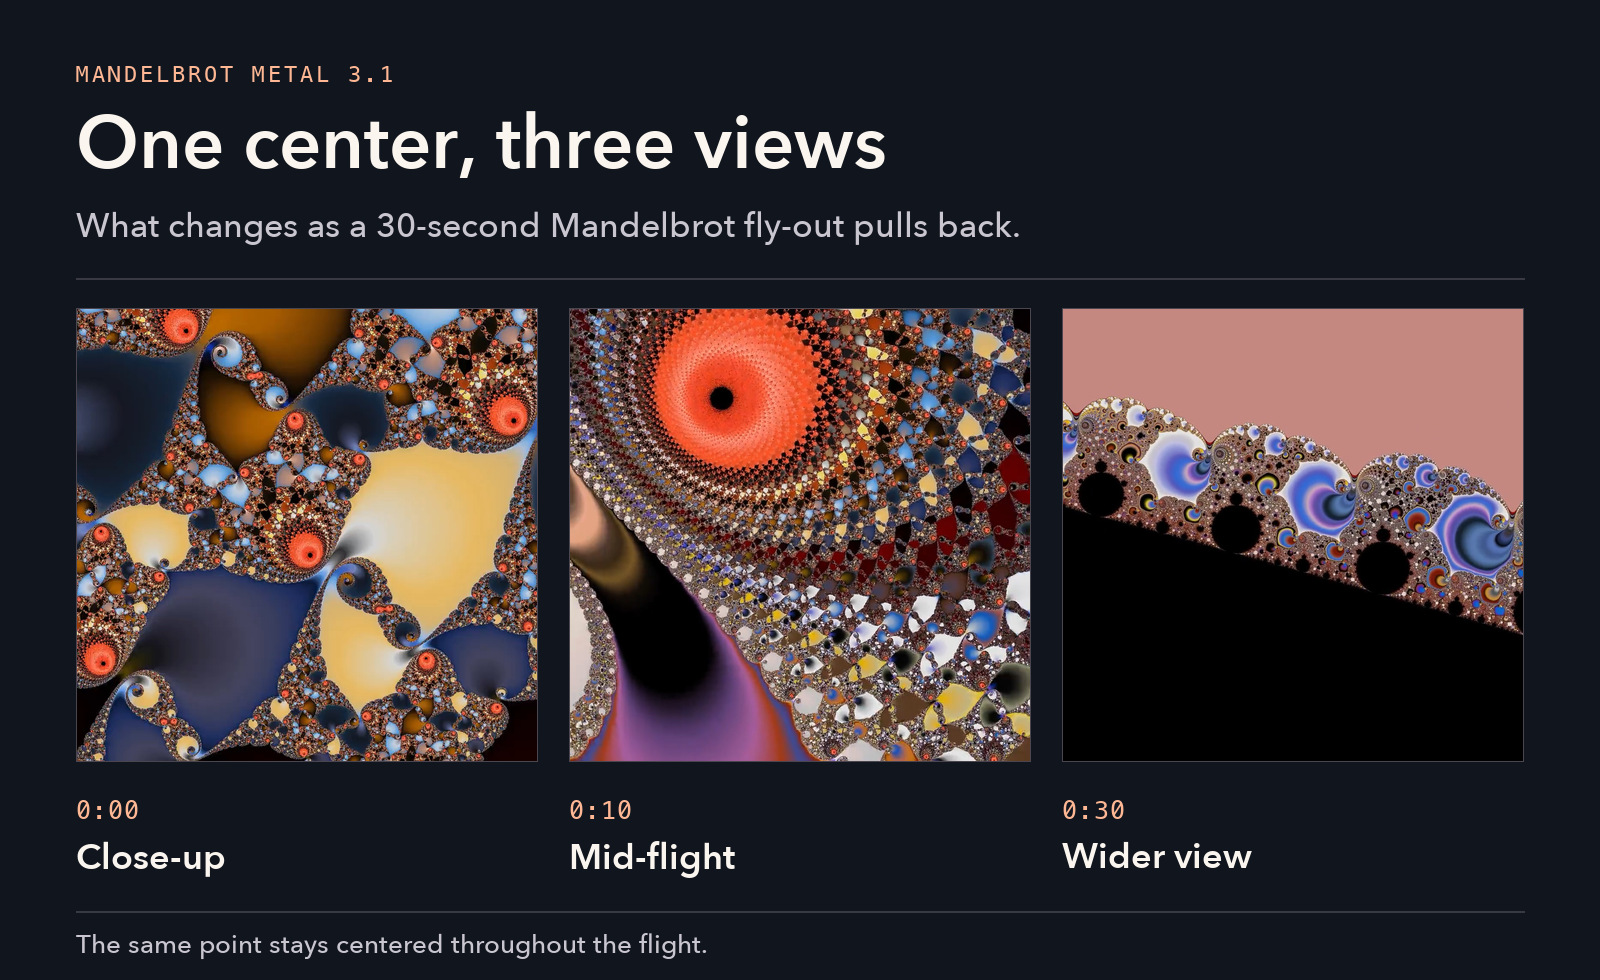
At the start of this fly-out, the frame is full of blue shapes and orange spirals. Ten seconds later, a copper-colored spiral fills one side of the screen. By the final frame, that spiral is one detail along a scalloped boundary. The whole sequence stays centered on a single point.
Mandelbrot Metal 3.1 turns a favorite Mandelbrot or Julia view into this kind of movie. You can render the MP4 on iPhone or iPad, or send the same flight to an Apple Silicon Mac for rendering in Terminal. Both export paths are included with every Pro plan and Legacy Pro. Free users can set up a flight.
Your current view is the close-up
Explore until you find the detail you want to feature. Set your palette and, if you’re using 3D Look, the lighting. With that view on the canvas, open More (…) → Movies.
- Fly In
- Open on the wider scene and end at your close-up. The detail is the reveal.
- Fly Out
- Start at your close-up and pull back. The surrounding structure is the reveal.
The center stays fixed while the magnification changes. Full zoom range connects your close-up with overview scale around that point. Choose 16×, 256×, 4,096×, or 65,536× for a shorter range. On iPhone or iPad, choose a duration from 5 seconds to 2 minutes. Turn on Ease start and finish for a gradual departure and arrival.
Render on iPhone or iPad
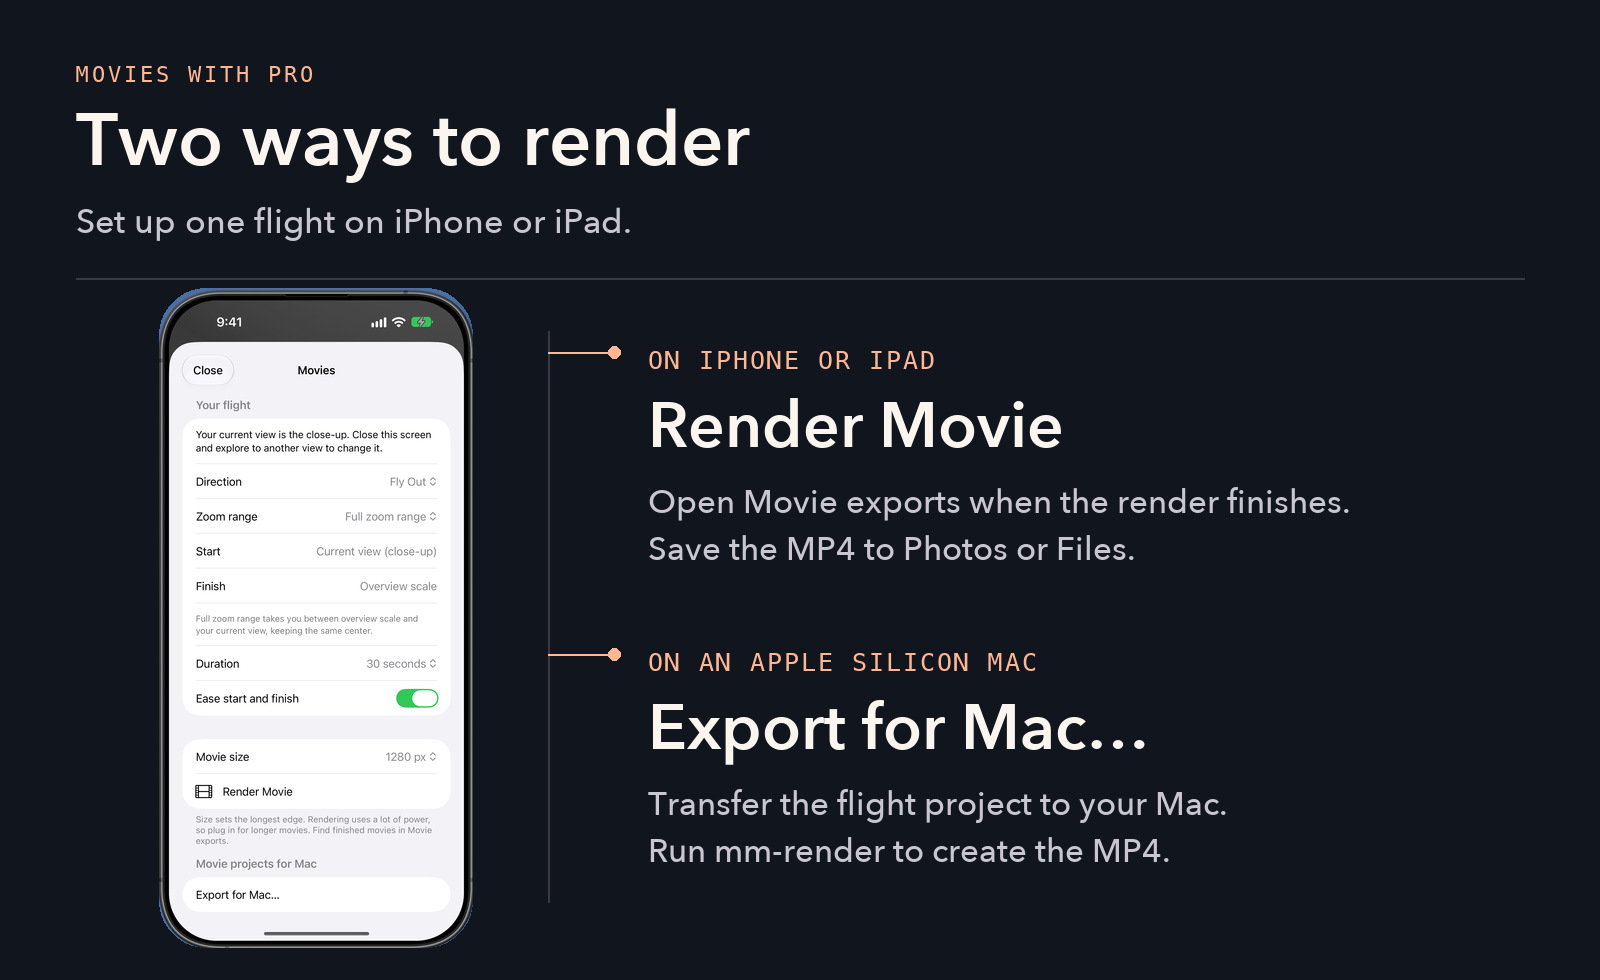
- In Movies, choose 1280 px or 1920 px for the long edge. Your canvas determines the proportions. For a first pass, try 5 seconds at 1280 px.
- Tap Render Movie. Follow progress in Movie exports, where you can pause or resume a render. Plug in for longer jobs. If the system suspends rendering, reopen the app and return to Movie exports to continue from saved progress.
- When the render finishes, tap Save to Photos or Share or Save to Files. The result is a silent H.264 MP4 at 30 frames per second.
Send the flight to a Mac
Choose Export for Mac…, then Save or Share Flight Project. AirDrop the .mmflight.json file to your Mac or put it in iCloud Drive. The project carries your precise center and close-up scale, the original canvas dimensions, the palette’s color data, and the render and flight settings. Those details let the Mac frame and color the same scene.
Find the mm-render developer preview on GitHub. It requires an Apple silicon Mac running macOS 15 or later. Open Terminal in the folder containing the executable and its companion Metal bundle. Use the actual filename of the project you exported.
./mm-render \
  --project "$HOME/Downloads/My Flight.mmflight.json" \
  --output "$HOME/Movies/My Flight.mp4"
The command uses the direction, range, duration, and easing saved in the project. The default MP4 is silent H.264 at 30 fps with a 1,920-pixel long edge. Add --long-edge 720 --samples 1 for a quick proof, or use --fps and --long-edge to set your own output. The CLI also accepts existing bookmark JSON via --bookmark. Use a flight project when you want to carry over the source framing and any custom palette in one file.
Deep zooms and high iteration counts can take time on a Mac, too. Press Control-C to stop and save completed work. Keep the whole .render folder and run this command to resume the job.
./mm-render --resume "$HOME/Movies/My Flight.mp4.render"Watch both directions
Try both directions with the same close-up. If you keep pausing at one point in the movie, try shortening the zoom range around the detail you want to linger on.